

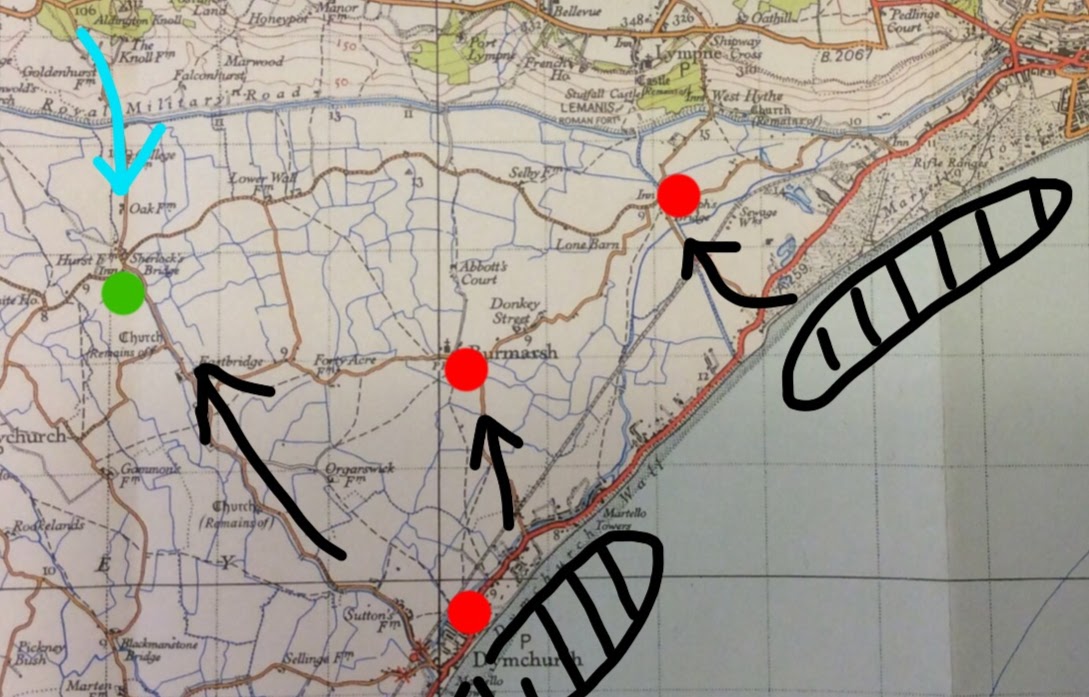
This map shows the concentrated focus of the the German Landings on S-day and the significant actions which have already been fought in this sector. Tracking inland the key day one objective is to get beyond the Royal Military Canal. Airborne troops have already been landed beyond the canal to capture locations such as Lympne Airfield but the Germans want to capture the South Downs high ground to protect the landing beaches. After a slow start the British defenders are waking up and have realised they must slow the advance and form a strong defensive line along the hills and canal. To do this a small mobile force has been sent to delay the advance at Sherlock’s Bridge. The Germans having subdued the defenders at Dymchurch have sent a reconnaissance force to ascertain if the bridge remains intact, to capture it if possible and open the way for the advance.

Dispatched from Aldington the British force is strong on courage but low on pretty much everything else, with a single Vickers Tank and some modified defensive vehicles if the Germans assault with any strength the British can’t hope to hold the bridge.

Luckily the German heavy armour is still occupied in Dymchurch or being unloaded from transports so the reconnaissance force whilst fast moving is only lightly Armoured. Both sides are intent on capturing the bridge.

German motorcycle troops are already at the bridge, but they won’t be able to hold it on their own

They spread out to hold any defenders back whilst the infantry advance towards the bridge
The German commander can’t believe his eyes when he sees the British improvised equipment, a tiny Beaverette ‘armoured’ car and what looks like a mobile post box (a smith gun)

The German infantry advance captured at the time

British infantry quickly fan out

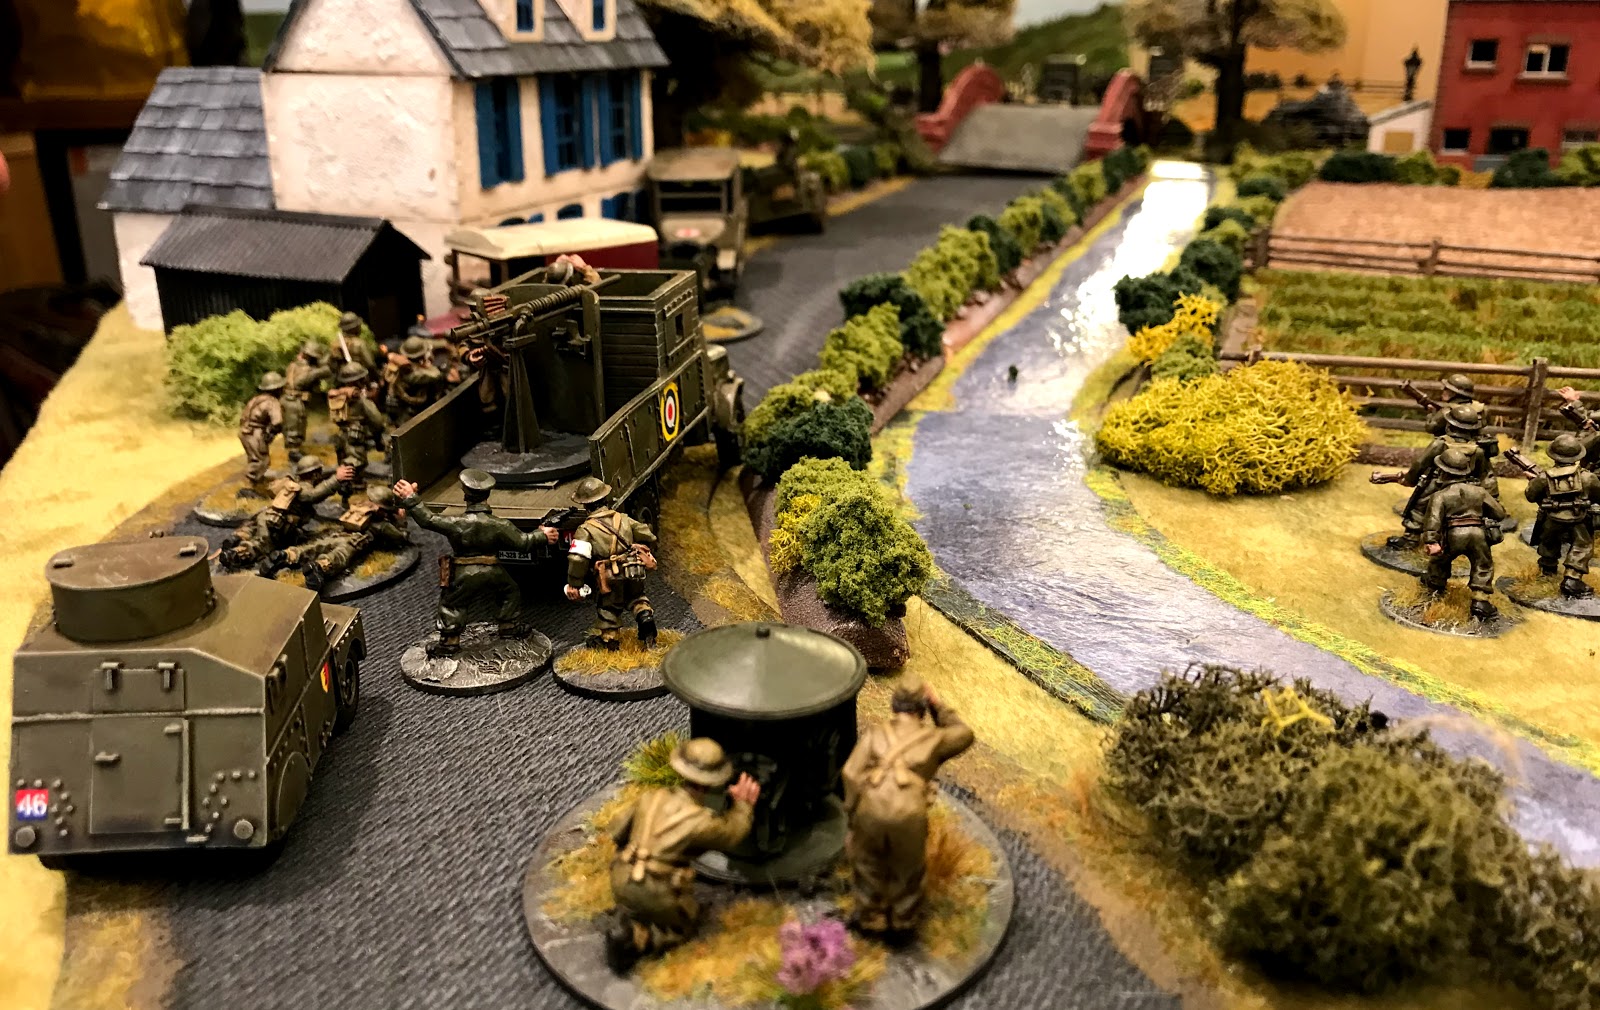
whilst the armadillo with its autocannon and the beaverette move up to the bridge

The german armoured vehicles a Rad 8 and a Sd.Kfz 222 are reluctant to go over the bridge without infantry support so they take up positions east and west of the bridge

The Germans also have a Pz I it carries nothing heavy than machine guns but will be devastating if the British infantry get out in the open

The battle is heating up around the bridge and despite the significant risk to themselves the Vickers tank charges across the bridge at full speed scattering the German infantry but doing Little damage other than knocking out the German transports

The Germans assault the beaverette but somehow fail initially to knock it out (the driver just managed to shut the hatch before a stick grenade was thrown in)

Breaking across open ground the Brits make for the back of the Pub

And rush for the bridge using The armadillo as cover

But the German commander is alert to the risk and orders the Rad 8 to fire

Despite its concrete armour the armadillo bursts into flames
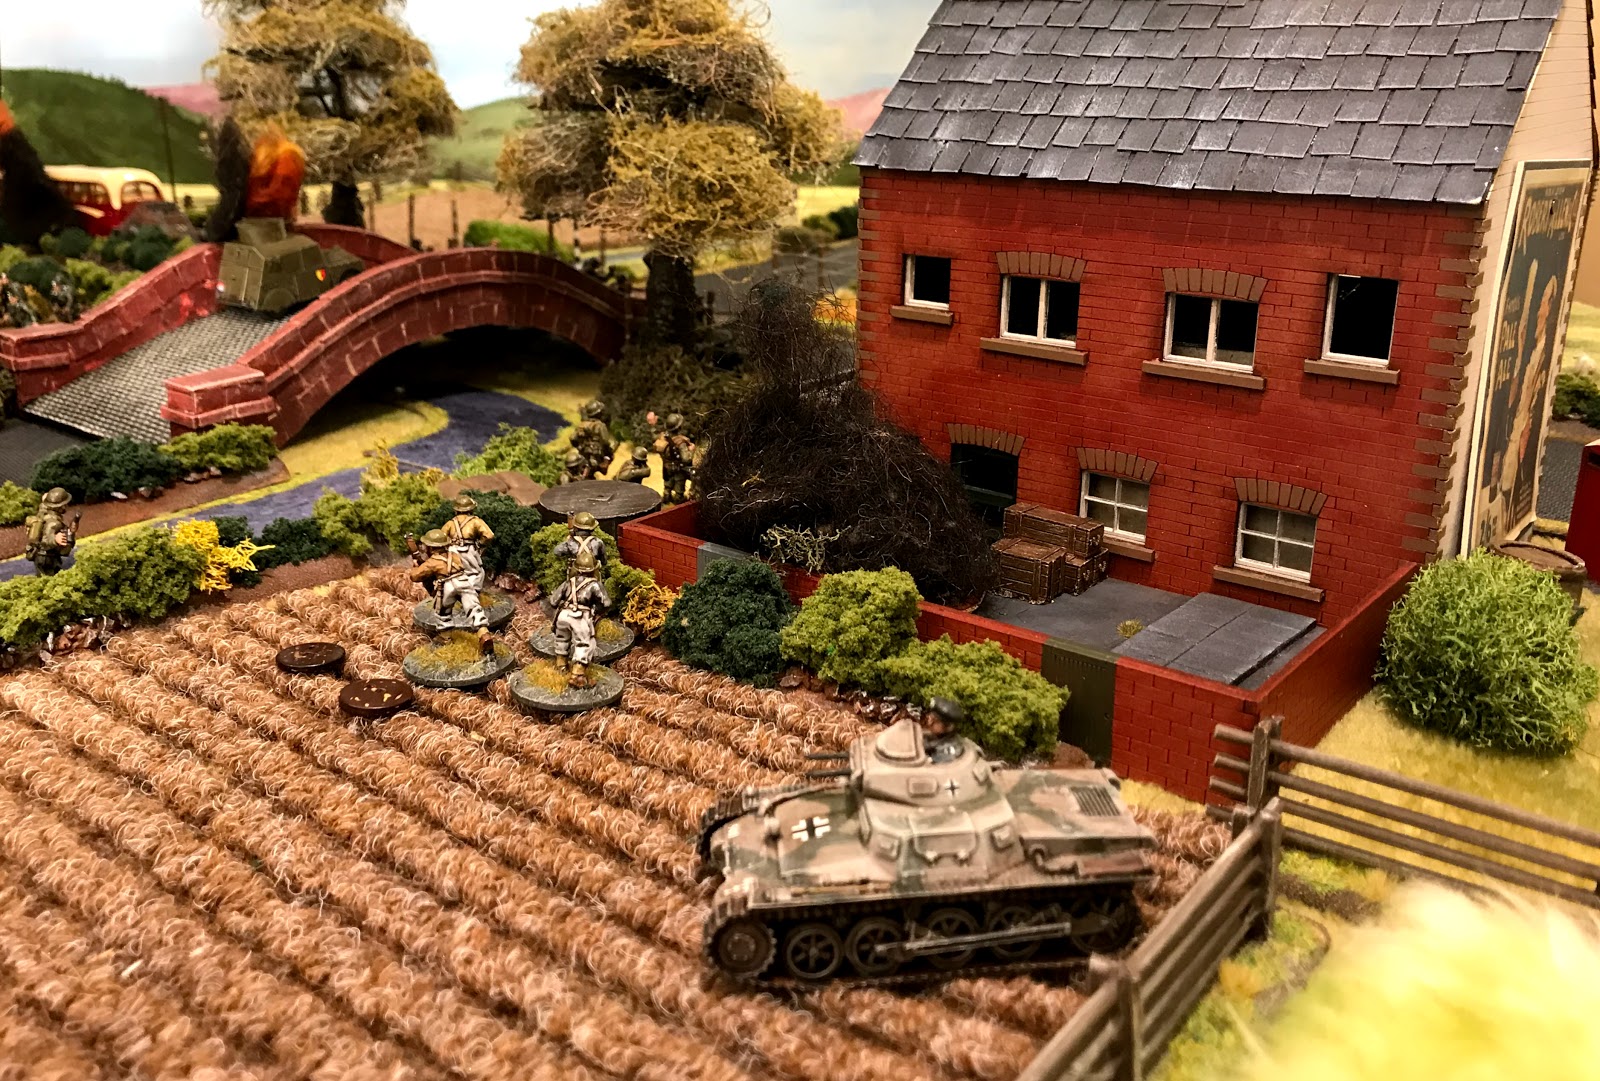
Spotting its chance the Pz I breaks trough catching British infantry in the open it isn’t a pretty sight

The beaverette is also in flames now but there is enough british infantry to make a serious assault on the objective, the battle is in the balance

The British Artillery is decidedly second rate hitting almost nothing during the battle

the British have managed to recapture the bridge but another German unit is ready to charge........you are joking a blunder sees them flee ! Suddenly with time running out it is not looking good for the Germans

But there are almost no British left a German unit has broken through on the far side of the bridge

Still can’t hit a thing the artillery pounds away

A lucky escape for the German commander as his Panzer wagon is blown up

In retaliation the Pz I spots the British commander Lt Harrison hiding in a ditch and opens up with both machine guns

As the battle comes to a close the Germans have the bridge and are advancing in force. The question is have the British bought enough time for their comrades to either blow up or defend the next bridges over the Military Canal.
Splendid return to Sealion and now I feel I am back into there will be more to come 😀


0 Yorumlar